When you take a photo, the goal is often to capture a moment that tells a story or conveys a mood. But even the best photos can benefit from some editing to bring out their full potential.
The challenge lies in enhancing your image without making it look artificially altered or "overcooked." Achieving this natural, stunning effect requires understanding the basics of photo editing—knowing what to adjust and how much.
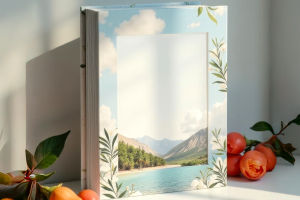
Imagine your photo as a canvas. Editing is like adding a gentle brushstroke to highlight details, not repainting the whole scene. This mindset helps keep your edits purposeful and restrained.
Start with Light and Exposure
One of the most fundamental aspects of photo editing is adjusting light and exposure. Often, photos might be too dark or too bright, washing out details or hiding textures.
Key adjustments to focus on include:
• Exposure: Gently increase or decrease brightness to balance the image. Avoid pushing it too far, which can cause loss of detail in shadows or highlights.
• Contrast: Adding subtle contrast can make your photo pop by emphasizing the difference between light and dark areas.
• Highlights and Shadows: Lowering highlights recovers details in bright areas, while lifting shadows brings out hidden textures in darker parts. This balance is essential for a natural look.
Remember, subtlety is key. Small tweaks often make a bigger impact than extreme changes.
Enhance Colors with Care
Color correction can dramatically change the feel of your photo but must be handled delicately to avoid unrealistic results.
Tips for natural color adjustments:
• Use the White Balance tool to correct any unwanted color tints (like too much blue or yellow). This restores true-to-life tones.
• Adjust Saturation and Vibrance with restraint. Vibrance boosts muted colors gently without oversaturating already bright areas, while saturation affects all colors evenly and can easily go overboard.
• Experiment with the HSL (Hue, Saturation, Luminance) panel in Lightroom to fine-tune specific colors—brighten greens in foliage or tone down reds in skin without impacting the whole image.
Sharpen Details Without Noise
Sharpness helps draw attention to important elements in your photo, such as eyes in a portrait or textures in a landscape. However, over-sharpening can create harsh edges or graininess.
To sharpen effectively:
• Use the Sharpening slider modestly. A little clarity can add definition, but too much can look unnatural.
• Combine sharpening with Noise Reduction if your photo shows grain, especially in low-light shots. Noise reduction smooths the image but can also soften details if overused.
Use Local Adjustments to Refine
Instead of applying changes across the entire photo, use local editing tools to target specific areas that need enhancement.
Examples of local edits include:
• Brightening just a face or subject to make it stand out.
• Adding a slight vignette around edges to naturally draw the eye inward.
• Enhancing textures in certain parts like leaves or fabrics without affecting the whole photo.
Local adjustments add precision and help avoid global edits that can make images look flat or artificial.
Less Is More: Avoiding Over-Editing
The biggest trap in photo editing is temptation to "fix everything." It's easy to get carried away with sliders and presets, but this often leads to photos that feel fake or too stylized.
Expert photographers and editors advise a step back: after editing, give your eyes a rest, then revisit your photo to see if it still looks natural. If you notice glaring signs of manipulation—unnatural skin tones, halos around subjects, or overly saturated colors—dial back your changes.